The Tam-Tara Deepcroft Dungeon Guide – FFXIV A Realm Reborn
Duty Information
Expansion: A Realm Reborn
Encounter: The Tam-Tara Deepcroft
Players: 4 Players (1 Tank, 1 Healer, 2 DPS)
Duty Finder Type: Dungeon
Level: 16
Item Level: 19
Unlock Requirement: A Realm Reborn
Common Failure Points
- Ignoring the Void Soulcounter’s Enthunder cast and letting the tank take unnecessary damage.
- Failing to kill Galvanth’s tethered imps, which leaves the boss invulnerable.
- Treating the final encounter like a burn fight instead of prioritizing the shield mechanic correctly.


← Back to A Realm Reborn Dungeon Rankings
Dungeon Overview
The Tam-Tara Deepcroft sends adventurers beneath the forests of Gridania into a corrupted burial ground overtaken by cultists and voidsent. As the second dungeon in the early A Realm Reborn sequence, it builds on Sastasha’s foundation by introducing target priority and simple boss shielding mechanics.
While still an early-game duty, Tam-Tara begins teaching players to pay attention to more than just the boss itself. Multi-stage encounters, interruptible casts, and add control all start to matter here.
The result is a dungeon that remains simple by modern standards, but quietly introduces mechanics that appear throughout the rest of Final Fantasy XIV.
Dungeon Objectives
- Destroy the cultist orbs
- Obtain the Cultist Rosary
- Break through sealed barriers
- Defeat Galvanth the Dominator
Walkthrough Highlights
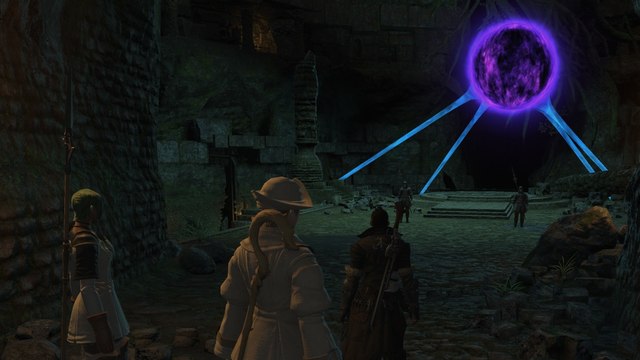
Cultist Orbs
Throughout the dungeon, magical cultist orbs power barriers and rituals that block the way forward.
Destroying these objects is required to progress deeper into the Deepcroft.
Ritual Chambers
Several chambers function as small ritual arenas. Each begins with a pack of enemies, and after those enemies are defeated, a Void Soulcounter appears.
These repeated sequences introduce the dungeon’s ritual structure and teach players to clear priority targets before the next phase begins.
Void Soulcounter Encounter Groups
First Chamber
- Gravedigger ×2
- Dalamud Priest
Second Chamber
- Gravedigger ×3
- Dalamud Priest
Third Chamber
- Gravedigger ×4
- Octavel the Unforgiving
After the initial enemies are defeated, the Void Soulcounter appears in each chamber.
Need the unlock path? See All FFXIV Dungeon Unlock Requirements.
Boss Encounters
Void Soulcounter
Key Mechanics
Enthunder — Buffs the boss’s auto-attacks with additional lightning damage. The opening cast can be interrupted.
Dark Orb — Basic single-target damage on the main target.
Condemnation — Frontal conal AoE. Step out of the cone to avoid unnecessary damage.
Failure Points
If the party does not interrupt Enthunder, the tank takes noticeably more damage than necessary during an otherwise simple encounter.
Galvanth the Dominator
Key Mechanics
Mind Blast — Circular AoE centered on the boss that inflicts Paralysis on players hit.
Drain Touch — Single-target attack on the tank that also heals the boss.
Add Phase
During the encounter, the boss summons:
- Inconspicuous Imps
- Deepcroft Mitelings
- Skeleton Soldiers
The Inconspicuous Imps tether to Galvanth and make him invulnerable. They must be defeated before the boss can be damaged again.
Failure Points
If the imps are ignored, Galvanth remains invulnerable and the fight stalls completely. This is the dungeon’s main mechanical check and the most common reason inexperienced groups slow down.
Notable Enemies
- Ak-Inik Varlet
- Fleshfly Swarm
- Carrion Beetle
- Croftlight
- Deepcroft Miteling
- Ak-Mena Groundsman
- Yarzon Feeder
- Inconspicuous Imp
- Skeleton Soldier
Difficulty Assessment
The Tam-Tara Deepcroft remains an early-game dungeon, but it is a clear step forward from Sastasha in terms of encounter structure.
It introduces several core ideas that continue throughout later duties:
- add priority targets
- interruptible casts
- simple invulnerability mechanics
- multi-stage arena encounters
The final boss in particular teaches players that sometimes the correct target is not the boss itself, but the add enabling the mechanic.
Continue the A Realm Reborn Archive
- A Realm Reborn Encounter Hub
Return to the A Realm Reborn encounter hub - A Realm Reborn Dungeons
View all A Realm Reborn dungeons - Relic Weapon Progression
See the A Realm Reborn relic weapon guide - A Realm Reborn Trials
Browse all A Realm Reborn trials
Previous Dungeon: Sastasha | Next Dungeon: Copperbell Mines
Guildmaster Notes
The Tam-Tara Deepcroft was once a sacred resting place beneath the Black Shroud.
Now its halls are filled with cult rites, voidsent whispers, and the uneasy feeling that something buried below should have stayed undisturbed.
For many adventurers, this is the first dungeon that teaches a simple truth: not every fight is won by attacking the biggest target in the room.