The Temple of the Fist Dungeon Guide (FFXIV Stormblood) – Boss Mechanics & Strategy
Duty Information
Expansion: Stormblood
Encounter: The Temple of the Fist
Players: 4 Players (1 Tank, 1 Healer, 2 DPS)
Duty Finder Type: Dungeon
Level: 70
Unlock Requirement: To Kill a Coeurl
Common Failure Points
- Attacking Arbuda from the wrong angle during Port and Star or Fore and Aft and taking the full unmarked cone hit and knockback.
- Hitting Arbuda from a non-open side during Killer Instinct, having the attack or spell parried back for significant self-damage.
- Failing to collect enough chakra orbs during Furious Fists, allowing Ivon Coeurlfist’s finishing Impact to land at full strength.
- Misreading the dragon gap positions during Coeurl Whisper‘s perpendicular two-line phase and being caught by a Vulnerability Up stack at a critical moment.
- Being hit by Touch of Slaughter and then immediately caught by Hurricane Kick before the healer can restore HP from single-digit health.


Dungeon Overview
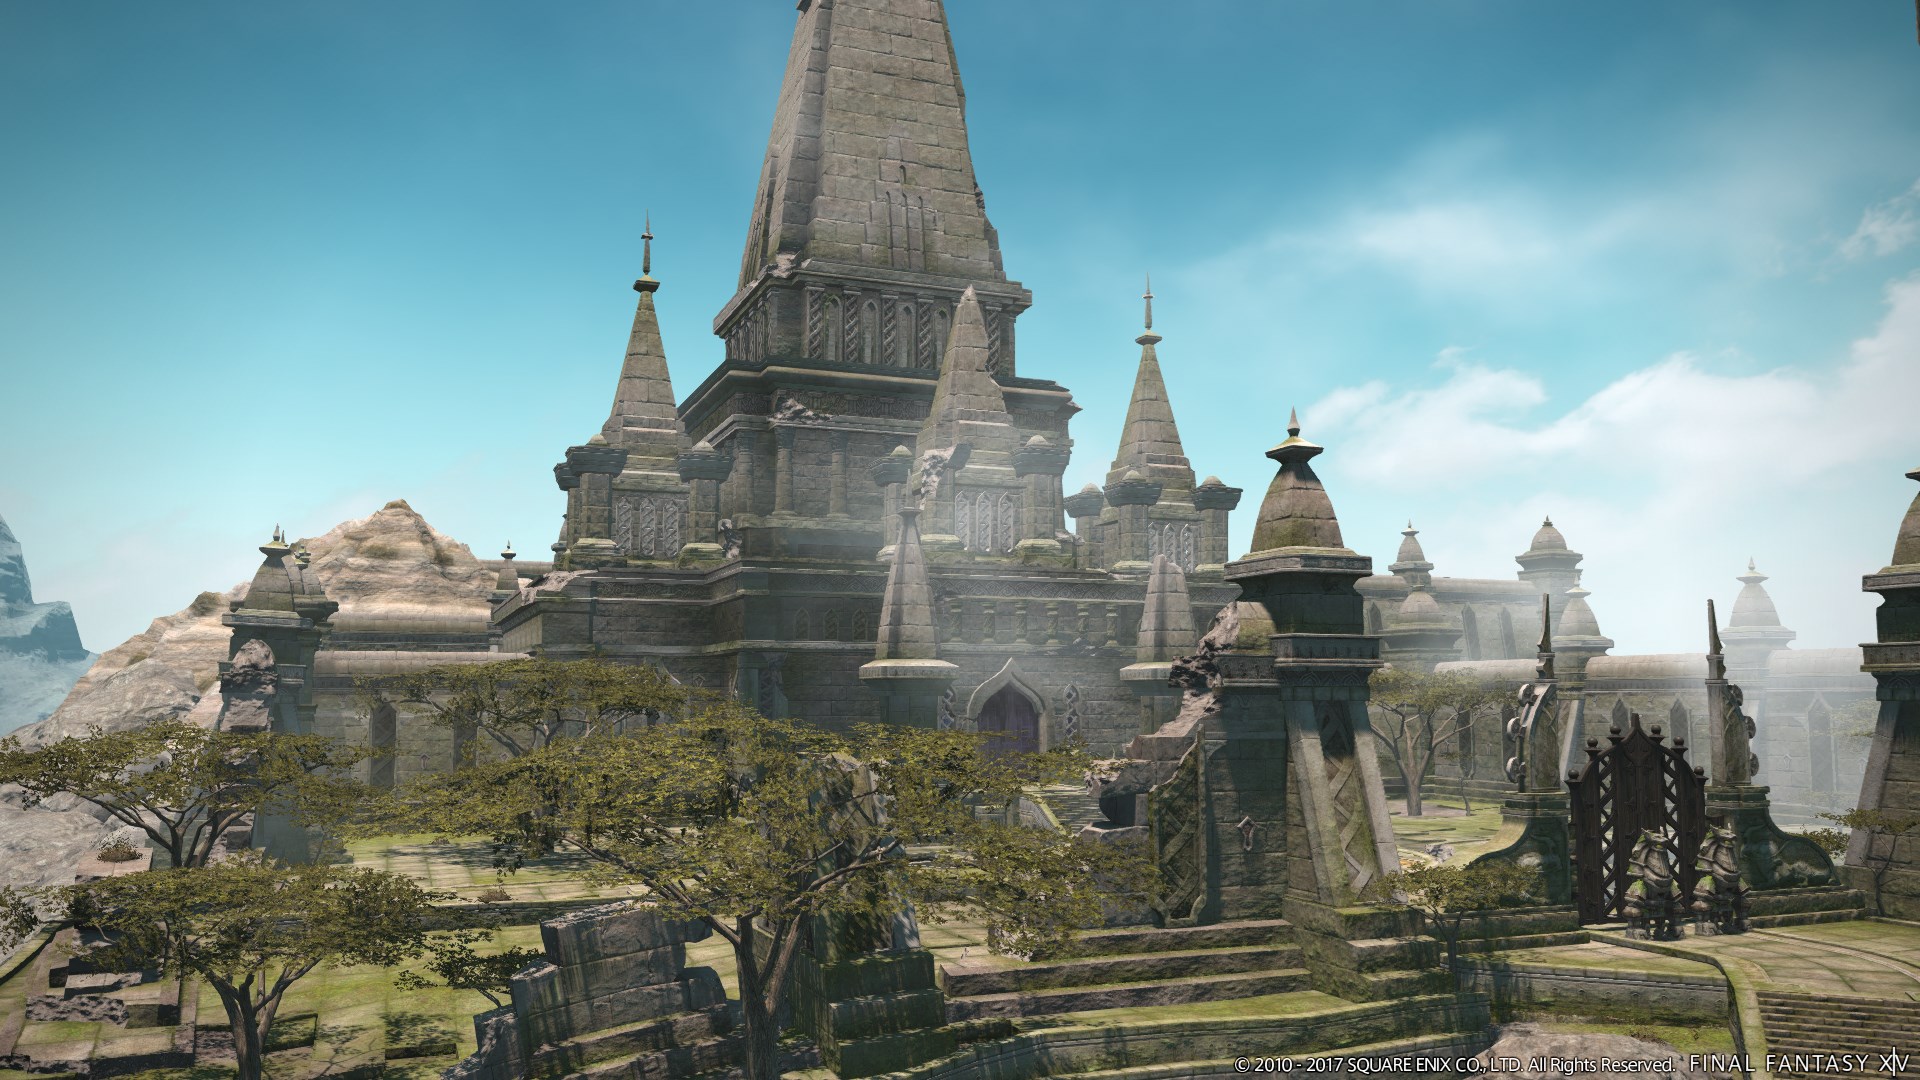
The Temple of the Fist is a level 70 dungeon introduced in Patch 4.0 with Stormblood. It is an optional dungeon set within a sacred monastery of the Fist of Rhalgr — the destroyed order of monk-warriors whose decimation by Garlean occupation forms one of Stormblood’s central emotional threads. The temple itself is overgrown, trap-laden in reputation if not always in practice, and inhabited by beings that test the worthiness of those who enter. Its atmosphere is austere and deliberate, and the three boss encounters that anchor it are among the most mechanically interesting in Stormblood’s optional dungeon tier.
Coeurl Sruti opens the run as a manageable twin-enemy encounter that rewards the same target-priority discipline introduced in Shisui of the Violet Tides and Bardam’s Mettle, while adding a stacking debuff component that punishes complacency about proximity to the boss. Arbuda is the dungeon’s standout encounter — a statue boss with massive unmarked directional cleaves that require the party to maintain specific positional discipline throughout, and a parry mechanic that punishes attacks from the wrong angle with reflected damage. Ivon Coeurlfist closes the dungeon with a mechanically layered two-phase encounter that combines dragon-line navigation, proximity AoEs, stack markers, and a unique orb-collection power mitigation phase before the final escalated cycle begins.
The Temple of the Fist is notable within Stormblood’s optional dungeon lineup for the Arbuda encounter specifically — it is one of the few dungeon fights in the expansion that demands continuous, informed positioning from every player throughout the entire fight rather than only during telegraphed windows. Groups that have not encountered the fight before should establish positional conventions before the pull. Need the unlock path? See All FFXIV Dungeon Unlock Requirements.
Dungeon Objectives
- Clear Rhalgr’s Shoulder
- Defeat the coeurls
- Arrive at Harmony
- Defeat Arbuda
- Clear the Closed Fist
- Defeat Ivon Coeurlfist
Boss Encounters
Coeurl Sruti
Key Mechanics
- Radial Blaster — Circular AoE centred on Coeurl Sruti. Hitting players applies stacking Magical Damage Received Up. Stay out of melee range when this fires or move away immediately after the cast begins.
- Electric Blaster — Cast approximately every 20% of Sruti’s health. Places purple markers on players, followed by an AoE Thunder hit at each marked location that applies Physical Damage Received Up. Move away from marked positions before the hit resolves.
- Coeurl Smriti — Spawns at approximately 77% of Sruti’s health. Behaves similarly to Sruti but uses Windblaster, a frontal cone AoE of approximately 150 degrees, in place of Radial Blaster. Has health comparable to Sruti. Focus should remain on finishing Sruti first, then switch to Smriti.
- Basic Instinct — Blue Mage spell used by Sruti. Follow the telegraph to avoid its effect.
Strategy Notes
Coeurl Sruti is a two-enemy encounter once Smriti spawns at roughly 77% health, and the priority decision at that moment defines the rest of the fight. The correct response is to continue focusing Sruti and kill it before engaging Smriti in earnest. Sruti is already wounded when Smriti appears, and burning Sruti down quickly reduces the total duration of the two-enemy phase — the period during which both the Radial Blaster and Windblaster are simultaneously active, and during which the party must manage positioning relative to both bosses at once. Splitting damage between the two extends this window unnecessarily and increases overall healing demand.
While both enemies are alive, the party must maintain awareness of Smriti’s facing direction alongside Sruti’s own casts. Windblaster is a wide frontal cone — approximately 150 degrees — which covers most of the area in front of Smriti and catches players who are focused on Sruti without tracking Smriti’s orientation. Keep Smriti in peripheral view and be prepared to sidestep its cone while continuing damage on Sruti. Once Sruti is dead, the encounter simplifies substantially; Smriti fights cleanly without the Radial Blaster debuff to manage.
Electric Blaster fires on a percentage threshold and places purple markers on players that detonate as Thunder AoEs. Each detonation applies Physical Damage Received Up, making it important to move away from the marked position before the hit lands rather than tanking it in place. The debuff stacks, so players marked repeatedly who stand in their own detonation zones will accumulate meaningful incoming damage amplification for the tank and healer to manage. Scatter briefly when markers appear, let them resolve in open space, and return to position promptly. Radial Blaster operates on the same principle — players who clip it accumulate Magical Damage Received Up stacks that compound with any subsequent magic-aspected hits in the encounter.
Failure Points
The transition moment when Smriti spawns is where most groups take their heaviest early damage. A party that stops to assess the new target rather than immediately recognising it as a deprioritised secondary enemy will often split their damage instinctively, leaving Sruti alive longer and Smriti free to use Windblaster on players standing in its facing direction. Communicate the priority before the pull and the transition becomes a non-event.
Stacking debuffs from Radial Blaster and Electric Blaster are the encounter’s attrition mechanics. Neither is lethal in isolation, but accumulated Magical Damage Received Up and Physical Damage Received Up stacks during the two-enemy phase will amplify incoming damage enough to put pressure on the healer in the fight’s final stretch. Players who stay disciplined about moving out of Radial Blaster range and clearing their marker positions before Electric Blaster detonates will keep the debuff loads manageable throughout.
Arbuda
Key Mechanics
- Port and Star — Massive unmarked cone AoE covering Arbuda’s left and right sides simultaneously. Deals significant damage and knocks back any player caught. Safe positions are directly in front of or directly behind the boss.
- Fore and Aft — Massive unmarked cone AoE covering Arbuda’s front and back simultaneously. Deals significant damage and knocks back any player caught. Safe positions are directly to either side of the boss.
- Fourfold Shear — Tankbuster that tracks the tank even if they move. Apply mitigation and heal through.
- Hellseal — Players must move to the corresponding glowing symbol on the arena floor before the cast resolves. Damage does not apply instantly at cast end, giving a small grace window. Timing is tight; begin moving as soon as the symbol is identified.
- Tapas — Telegraphed AoEs that chase each player. Move out of the tracking circles before they detonate.
- Killer Instinct — Arbuda assumes a defensive stance with one open side. Attacking from any other direction causes the attack to be parried back at the attacker, dealing significant self-damage. Area-effect Limit Breaks can also be parried during this stance. Identify the open side and attack only from that angle until the stance ends.
Strategy Notes
Arbuda demands something unusual for a dungeon encounter: consistent, informed positional discipline from every player throughout the entire fight, not only during telegraphed windows. The two primary cleave mechanics — Port and Star and Fore and Aft — are both massive, unmarked, and fire from Arbuda’s cardinal and intercardinal axes respectively. There are no AoE indicators. The safe zones are permanent features of the fight’s geometry, not reactive dodges: stand at a 45-degree diagonal from Arbuda’s cardinal directions and both cleaves are avoidable from the same position. In practical terms, this means non-tank players should hold position at one of Arbuda’s four diagonal corners — front-left, front-right, rear-left, or rear-right — and stay there unless a specific mechanic demands otherwise. Port and Star fires along the sides; step to front or back. Fore and Aft fires along front and back; step to the sides. From a diagonal, both directional shifts are short and fast.
Establishing this positioning convention as a party before the pull is the single most important preparation for this encounter. Players who stand at cardinal positions — directly in front, behind, or to the side of Arbuda — will be hit by one of the two cleaves on almost every rotation. The knockback component of both attacks is significant enough to displace players into inconvenient positions for subsequent mechanics, compounding the danger. Hold the diagonals and the fight becomes manageable; ignore them and the fight becomes a sustained healing burden.
Hellseal requires players to identify a glowing symbol on the arena floor and move to it before the cast resolves. The timing is genuinely tight, but the cast does not apply damage at the exact moment it ends — there is a brief grace window. Identify the symbol early in the cast rather than waiting for the cast bar to finish, begin moving immediately, and the window is sufficient. Tapas places tracking AoEs on each player that follow briefly before detonating — move continuously in a direction away from the nearest player to avoid spreading the blasts into shared space.
Killer Instinct is the fight’s most punishing individual mistake potential. When Arbuda assumes the defensive stance, one side of its body becomes the only valid attack angle — all others cause the attack to be reflected back at the attacker. This applies to spells and abilities as well as melee attacks, and critically, it also applies to AoE Limit Breaks. The open side must be identified immediately when Killer Instinct activates, and all damage must come exclusively from that angle until the stance drops. A player who fires a Limit Break from the wrong side will take the reflected damage themselves and waste the LB charge. If the open side is unclear, wait a half-second rather than guessing — the reflected damage is significant.
Failure Points
The overwhelming majority of avoidable damage in this fight is taken by players who are not holding diagonal positions between cleave casts. Port and Star and Fore and Aft rotate through the fight with regularity, and every player at a cardinal position when either fires takes a meaningful knockback hit that disrupts positioning for whatever follows. The diagonal convention is not complex — it requires only that players establish it consciously before the pull and maintain it as their default standing position throughout. Groups that treat it as a reactive dodge rather than a persistent stance will be hit repeatedly.
Killer Instinct reflected attacks are the encounter’s most dramatic individual failure, and they are entirely avoidable through a moment of patience. A melee player who does not check the open side before pressing an ability, or a caster who fires into Arbuda during the stance without confirming the angle, takes the reflected damage at full value. The stance is visually distinct and the open-side indicator is readable — the only cause of reflection deaths is acting before looking.
Ivon Coeurlfist
Key Mechanics
- Spirit Wave — Light partywide damage that spawns a persistent whirlwind at a random player’s location. The whirlwind deals repeated damage and applies Vulnerability Up stacks to players who remain inside it. Move away from the whirlwind’s spawn location immediately.
- Hurricane Kick — 270-degree cleave aimed at a random player, leaving a 90-degree safe zone directly behind the boss. Inflicts a brief Stun if it connects. Move to the safe spot behind Ivon or step away from the boss entirely.
- Touch of Slaughter — Targets a random player with a green marker, leaps to them, and reduces their HP to a single digit. The healer must restore this player’s health immediately. In the post-phase rotation, Touch of Slaughter is directly followed by Hurricane Kick — the healed player must be at full health before the Kick fires or the combo is likely lethal.
- Coeurl Whisper — Spawns a line of dragon heads that slowly travel across the arena. Gaps exist between the dragons; weave through a gap to avoid damage and Vulnerability Up stacks. In the second phase, two perpendicular lines spawn — each line only has dragons in one half of its length. The two lines cross during Rhalgr’s Piece, leaving a single safe corner where neither line has dragons. In low-damage groups, a third variant appears: a line with a very small gap paired with a simultaneous Rose of Destruction stack marker, requiring the party to stack inside the gap.
- Silent Roar — Wide blue line AoE aimed at a random player. Knocks back and applies Vulnerability Up. Dodge laterally to avoid the line.
- Rhalgr’s Piece — Proximity AoE centred on the arena. Move to the corners to reduce damage taken.
- The Rose of Destruction — Stack marker on a random player. The full party must stack to share the damage. High-damage groups may skip this mechanic entirely.
- Furious Fists — Ivon charges a powerful finishing attack. Glowing chakra orbs tethered to him fill the arena. Collecting orbs reduces the strength of the attack and grants a short-lived stacking Damage Up buff. After the cast completes, Ivon floats to the arena centre and delivers approximately five downward punches followed by a finishing Impact strike of significantly greater damage. This marks the phase transition — all subsequent mechanics are comboed together in more demanding sequences.
Strategy Notes
Ivon Coeurlfist is a fight in two distinct acts, divided by the Furious Fists phase transition. The first phase introduces the encounter’s individual mechanics at manageable pacing, and the second applies them in overlapping combinations that demand cleaner execution. Understanding each mechanic in isolation before the transition makes the post-Furious Fists phase significantly less overwhelming.
The first phase’s most dangerous moment is the Touch of Slaughter and Hurricane Kick combination that appears in the later pre-transition rotation. Touch of Slaughter reduces a random player to single-digit health — a state survivable only if the healer responds immediately with a burst heal. Hurricane Kick follows directly, and a player still at near-zero health when it fires is almost certain to die. The healer’s sole priority from the moment Touch of Slaughter’s green marker appears is to restore that player’s health fully before the Kick resolves. Everything else — Spirit Wave positioning, movement for Hurricane Kick — is secondary to that single task.
Coeurl Whisper requires reading the dragon line configuration and identifying the gap before the line reaches the party’s position. In the first-phase single-line version, find the nearest gap and step through it with deliberate timing rather than waiting for the line to arrive. In the second-phase perpendicular version, both lines cross during Rhalgr’s Piece — two lines, each with dragons in only one half, leave a single clean corner where neither half has coverage. Identify that corner as soon as the lines spawn and begin moving toward it before Rhalgr’s Piece fires. The proximity AoE from Rhalgr’s Piece incentivises being at the corner already rather than running to it from the centre at the last moment. The low-damage variant adding a Rose of Destruction stack marker alongside a narrow-gap dragon line requires the party to be stacked inside the gap together — communicate the stack position quickly and hold it through both the dragon pass and the stack detonation.
When Furious Fists begins, every player should immediately stop attacking the boss and begin collecting the chakra orbs scattered across the arena. Each orb collected reduces the Impact damage and grants a stacking Damage Up buff that carries into the post-transition phase — there is no downside to collecting as many as possible. Spread across the arena to cover more orb ground quickly and do not cluster at the boss’s position waiting for the cast to resolve. After the orb collection window closes and Ivon floats to the centre, move away from the central punch columns and survive the Impact hit. The damage scales with how many orbs were left uncollected — groups that cover the arena thoroughly will take a survivable hit; groups that ignored the orbs entirely may wipe to Impact.
After the transition, Spirit Wave, Hurricane Kick, Coeurl Whisper, Silent Roar, and Rhalgr’s Piece begin appearing in overlapping sequences. The mechanics are the same as before the transition; the challenge is managing them simultaneously rather than sequentially. Whirlwinds from Spirit Wave persist and accumulate — identify their positions and treat them as permanent floor hazards for the duration of the fight. Hurricane Kick’s 90-degree safe zone behind Ivon remains the cleanest dodge, but the safe zone must be reached from wherever the party is already standing relative to current whirlwind and dragon-line positions. Prioritise clearing the safe zone path rather than holding a fixed position.
Failure Points
The Touch of Slaughter into Hurricane Kick sequence is responsible for more deaths in this encounter than any other mechanic combination. The gap between the two casts is short, and a healer who reacts slowly to the green marker — or who is displaced from the target by a concurrent Spirit Wave whirlwind — will fail to restore the single-digit HP player in time. The healer must treat Touch of Slaughter as an immediate interrupt to all other priorities the moment the marker appears. In the post-transition phase this combination arrives with additional concurrent mechanics active; the healer’s positioning throughout the fight should always keep the potential Touch of Slaughter target within easy healing range.
Impact from an undercollected Furious Fists phase is the encounter’s most avoidable wipe condition and the most commonly self-inflicted. Players who continue attacking the boss or stand near Ivon waiting for the cast to end rather than actively collecting orbs will find the Impact damage reflecting the full strength of the uncharged attack. The orb collection phase is brief and the arena coverage required is modest — spread out the moment Furious Fists begins and collect everything within reach. A party that covers the arena efficiently will enter the post-transition phase with a Damage Up buff, healthy HP, and a wipe avoided. A party that does not will enter it weakened and immediately facing the more demanding mechanic combinations of the second act.
Difficulty Assessment
The Temple of the Fist sits in the upper tier of Stormblood’s optional dungeons, with Arbuda in particular representing one of the more distinctive mechanical demands in the expansion’s dungeon lineup. The fight’s reliance on unmarked directional cleaves and a reflect mechanic that applies to all damage types — including Limit Breaks — requires a level of positional discipline that most Stormblood dungeons do not ask of their non-tank players. Ivon Coeurlfist’s two-phase structure and the Touch of Slaughter healing check add further pressure that makes the dungeon’s final stretch genuinely demanding.
- Target priority and simultaneous debuff management during Coeurl Sruti and Smriti
- Persistent diagonal positioning and reflect-awareness during Arbuda throughout the entire fight
- Healer response speed to Touch of Slaughter before the Hurricane Kick follow-up during Ivon Coeurlfist
- Arena-wide orb collection during Furious Fists and overlapping mechanic management in the post-transition phase
Groups that establish the Arbuda diagonal positioning convention before the pull and understand that Furious Fists requires active orb collection rather than passive survival will find the dungeon flows cleanly. The individual mechanics across all three bosses are well-telegraphed where indicators exist, and the fights reward spatial awareness built up across Stormblood’s earlier dungeon tier. Groups coming from Ala Mhigo or Kugane Castle will recognise the demand for deliberate arena management and find the Temple’s encounters a satisfying application of those skills.
Groups that freeroll the Arbuda positioning will take consistent knockback damage throughout the encounter from unmarked cleaves that could be avoided entirely with a standing diagonal, and the accumulated damage will put pressure on the healer going into Ivon Coeurlfist’s already demanding Touch of Slaughter sequences. The reflect mechanic during Killer Instinct is the fight’s sharpest individual pitfall — a single reflected Limit Break wastes a party resource that cannot be recovered mid-fight. Communicate the Arbuda positioning and the Killer Instinct rule before the pull, and the dungeon’s difficulty curve becomes fair and satisfying rather than punishing.
Previous Dungeon: Kugane Castle | Next Dungeon: The Drowned City of Skalla
Guildmaster Notes
The Fist of Rhalgr did not simply teach how to fight. It taught what fighting was for — a discipline in service of something larger than the self, a practice rooted in the understanding that strength without direction is indistinguishable from destruction. The temple still holds that lesson in its stones, even overgrown, even abandoned. The moss grows over the training grounds. The spirit flames drift through the corridors. But the shape of the place — the intention built into every chamber — does not decay the way flesh does.
Ivon Coeurlfist is what the order could produce when its purpose narrowed to a point. The power is genuine. The conviction is genuine. What is absent is the thing the temple was built to cultivate — the understanding that the fist is not the point, but the instrument. Walking out of the Closed Fist into the open air feels less like a victory than a reminder. Rhalgr’s teachings survived. What was done to those who carried them did not.