Doma Castle Dungeon Guide (FFXIV Stormblood) – Boss Mechanics & Strategy
Duty Information
Expansion: Stormblood
Encounter: Doma Castle
Players: 4 Players (1 Tank, 1 Healer, 2 DPS)
Duty Finder Type: Dungeon
Level: 67
Unlock Requirement: The Die is Cast
Common Failure Points
- Standing in front of adjacent Rearguard Bits that fire simultaneously, turning a narrow beam into a wide hit with no warning.
- Walking into a Rearguard Mine during repositioning, triggering a contact explosion for major damage.
- Failing to occupy the Magitek Missiles tower during the Hexadrone encounter, dealing avoidable partywide damage.
- Moving Gunsaw across party members during Grynewaht, since the beam pierces and will hit anyone caught in its line of fire.
- Dropping the Thermobaric Charge proximity marker too close to the party or into a Chain Mine field, leaving an active hazard in shared space.


Dungeon Overview
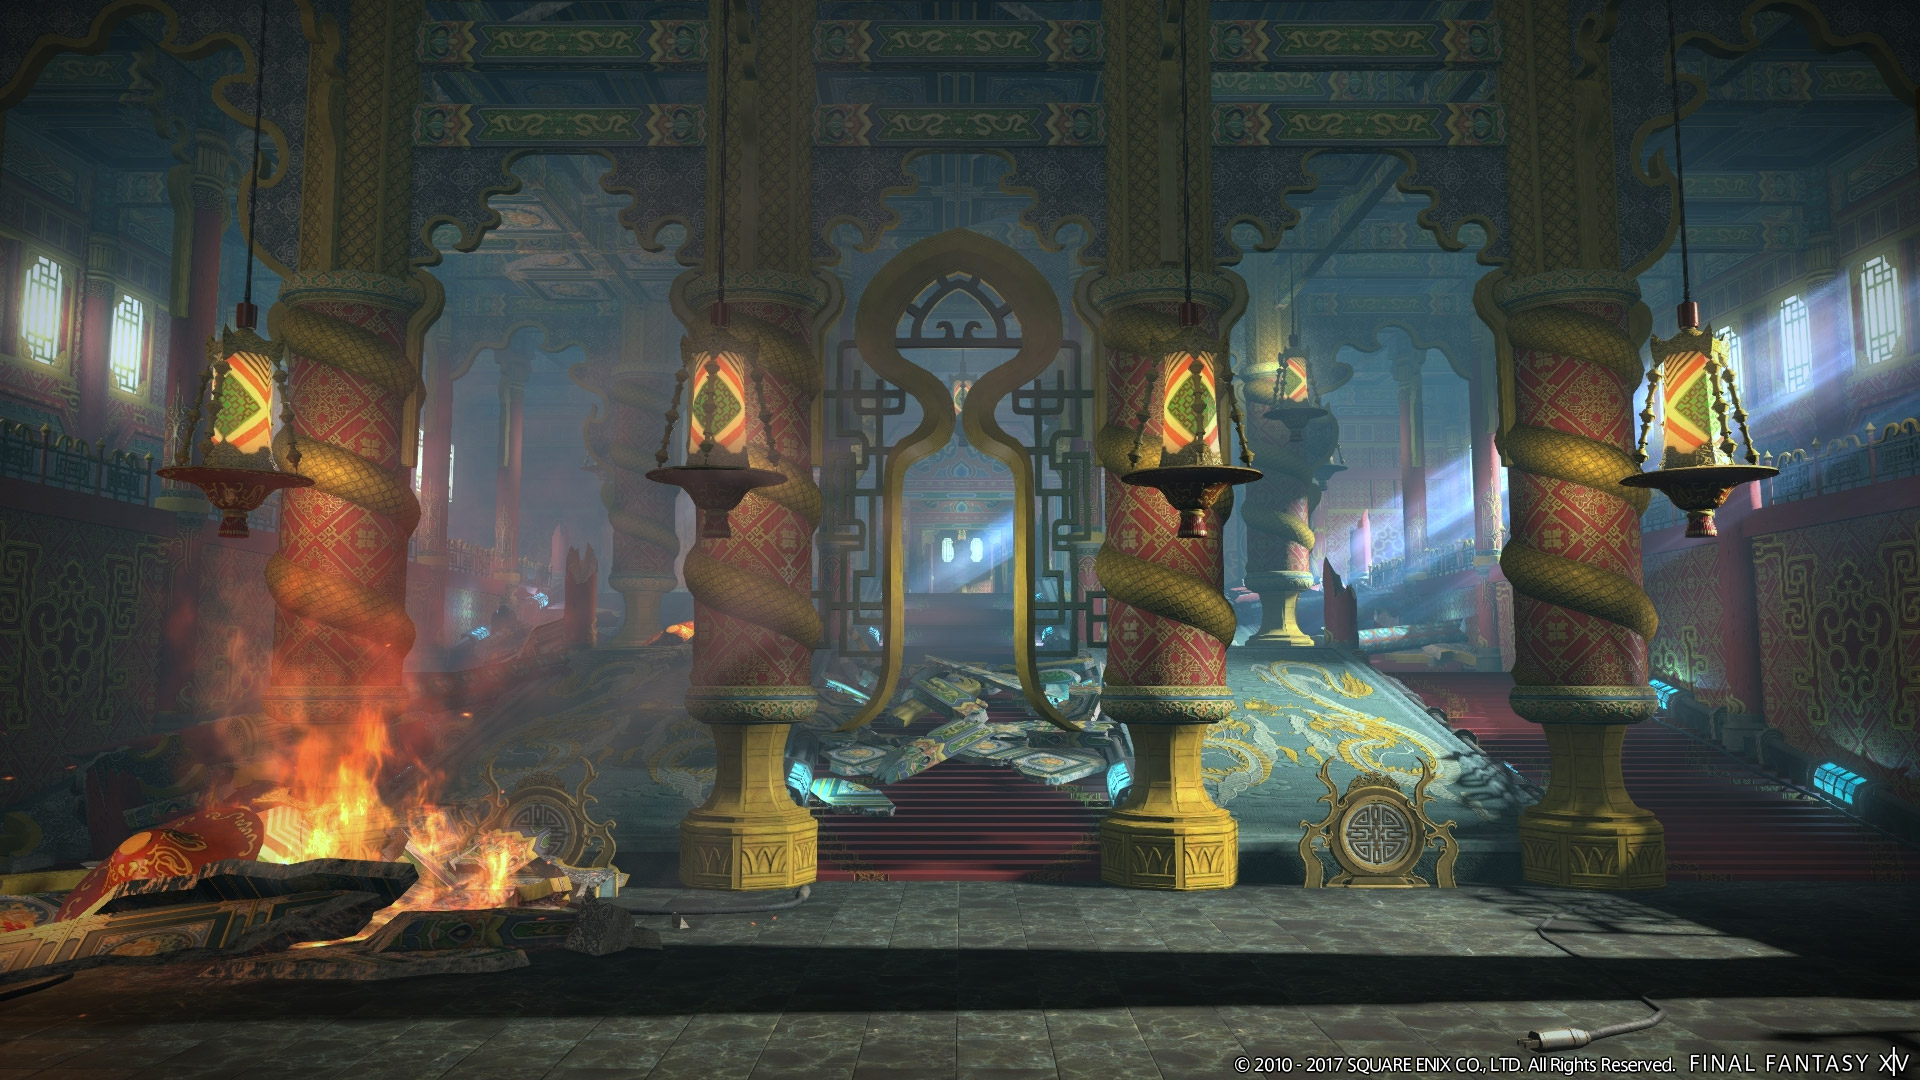
Doma Castle is a level 67 dungeon introduced in Patch 4.0 with Stormblood. It takes place within the occupied seat of Doman power — a fortress that has become a symbol of imperial control over the nation, and which the player and their allies move through as part of the broader Doman liberation arc. The dungeon’s aesthetic is accordingly grim and industrial, Garlean magitek machinery layered over the bones of an older, more elegant structure.
All three boss encounters are magitek constructs or enhanced soldiers, and the dungeon’s mechanical identity reflects that: arena hazards accumulate over time, bits and mines restrict movement, and the final boss combines several concurrent mechanics that demand individual responsibility in close quarters. The escalation across the three fights is deliberate — Magitek Rearguard introduces the core language of beam management and floating mines, Magitek Hexadrone adds arena restriction through Chain Mine fields and a tower soak, and Hypertuned Grynewaht synthesises nearly all of those ideas alongside new mechanics that require players to manage personal hazards without endangering their allies.
Doma Castle is one of the more mechanically demanding dungeons in Stormblood’s earlier tier. No individual mechanic is especially complex, but the final encounter in particular layers several simultaneous demands — piercing beams, proximity drops, arena segmentation, and chakram line AoEs — that require each player to manage their own positioning independently while remaining aware of the rest of the party. Groups that handle the earlier bosses with discipline will find Grynewaht a satisfying application of everything the dungeon has built up to that point.
The dungeon supports Duty Support, with Gosetsu, a Doman Shaman, Yugiri, and a Doman Liberator available as NPC companions. Need the unlock path? See All FFXIV Dungeon Unlock Requirements.
Duty Support
- Gosetsu — Samurai — Tank
- Doman Shaman — Shaman — Healer
- Yugiri — Ninja — DPS
- Doman Liberator — Samurai — DPS
Dungeon Objectives
- Arrive at the Third Armory
- Defeat the Magitek Rearguard
- Arrive at the Training Grounds
- Defeat the Magitek Hexadrone
- Arrive at the Hall of the Scarlet Swallow
- Defeat Hypertuned Grynewaht
Boss Encounters
Magitek Rearguard
Key Mechanics
- Cermet Pile — Tankbuster with a frontal cleave component. The tank should avoid facing the boss toward the group when this resolves.
- Garlean Fire — Fires one or two lines of circular AoEs in a direction indicated by a large arrow. Dodge to the side of the line rather than ahead of it. Later in the fight, two lines fire side by side.
- Rearguard Bit — Bits line up along the arena edge and fire narrow line AoEs across the arena. Adjacent bits will occasionally fire simultaneously, producing a wider combined beam. Watch for which bits activate together.
- Rearguard Mine — Small orange mines float across the arena. Contact detonates them for major damage. Do not move through their paths.
Strategy Notes
The Magitek Rearguard is an arena-awareness fight dressed up in a straightforward package. The boss itself hits firmly but predictably — Cermet Pile is the primary tank concern, and the tank should simply rotate the boss away from the party during the cast to keep the cleave from clipping anyone standing at melee range. The more interesting demands come from the arena itself, which fills with overlapping hazards as the fight progresses.
Garlean Fire is the most readable mechanic in the encounter. The large directional arrow gives clear advance warning of where the line of circular AoEs will travel — move perpendicular to the arrow’s direction and the cast is trivially avoided. When the fight escalates to two simultaneous lines, the available space narrows but the same principle applies: identify the gap between or beside the two lines and hold position there. The arrow indicators make this one of the most forgiving dodge windows in the dungeon.
The Rearguard Bits are where the fight demands more careful reading. Multiple bits line the arena edge and each fires a narrow beam across the floor — individually avoidable, but occasionally two adjacent bits fire at the same time, merging their beams into a single wider band. The key is watching the activation pattern rather than reacting to each beam independently. Identify which bits are lighting up and whether any neighbours are activating in the same window, then move away from the combined coverage area before the beams fire.
Rearguard Mines float across the arena on fixed paths throughout the fight and do not disappear once spawned. They detonate on contact for significant damage, and their paths cross the arena in ways that intersect with the positions players are trying to hold for Garlean Fire and Bit dodges. Keep the mine positions tracked in peripheral vision and plan movement routes that do not cross their trajectories. Repositioning through a mine path because a beam is incoming is the most common cause of accidental detonations — take the longer route when possible.
Failure Points
Adjacent Rearguard Bits firing simultaneously is the most dangerous moment in this fight, and it catches players who are tracking each bit individually rather than reading the group pattern. A single beam is narrow enough to sidestep with minimal movement; two merged beams cover significantly more of the arena and require earlier repositioning. Groups that clear this encounter cleanly have typically developed the habit of watching the edge for simultaneous activations rather than reacting to each beam as it fires.
Rearguard Mine detonations during repositioning are the other consistent source of avoidable damage. The mines are visible and their paths are fixed — there is no excuse for walking through one except divided attention. In the later stages of the fight, with mines active, bits firing, and Garlean Fire in rotation, the arena is genuinely cluttered, and players who have not been tracking all three hazard types simultaneously will find themselves with fewer safe routes than they expected.
Magitek Hexadrone
Key Mechanics
- Circle of Death — Large circular AoE centred on the boss. Move away from the boss when this is cast.
- 2-Tonze Magitek Missile — Stack marker on a random player. The full party must stack to share the damage.
- Chain Mine — A Hexadrone Bit appears on the arena edge and projects a damaging red field across a portion of the arena. Standing inside the field deals continuous damage and applies knockback. The field restricts available movement space for the remainder of its duration.
- Magitek Missiles — A tower spawns in the arena. At least one player must stand inside it before it resolves, or the entire party takes moderate damage.
Strategy Notes
The Magitek Hexadrone introduces arena segmentation as its core mechanical theme. Chain Mine fields laid by the Hexadrone Bits progressively reduce the safe area of the arena — not by dealing lethal damage instantly, but by making entire corridors and quadrants uncomfortable to stand in. Groups that ignore the fields and push through them will find the fight increasingly taxing on healing resources; groups that respect the boundaries and work within the remaining space will find each mechanic individually manageable.
Circle of Death is a straightforward displacement — when the cast begins, move to the arena edge to avoid the boss-centred explosion. The complication is that by the time multiple Chain Mine fields are active, the edges of the arena may already be partially restricted. Identify which sections of the outer ring are still clear before the Circle of Death cast lands and move toward those areas, not arbitrarily outward.
2-Tonze Magitek Missile places a stack marker on a random player and requires everyone to converge on that player’s position. In a wide-open arena this is trivial, but with Chain Mine fields reducing available space, the marked player’s position relative to the remaining safe area matters. The marked player should move to a clear, central position if possible rather than staying at the edge, making it easier for the party to stack without anyone stepping into a field during the approach.
The Magitek Missiles tower is the encounter’s only hard check. At least one player must occupy the tower when it resolves — if no one does, the entire party takes moderate partywide damage. The tower appears cleanly telegraphed in the arena and persists long enough to reach from most positions. Assign a default tower-soaker if the party is playing it safe, but in practice any player near the tower when it appears should step into it without waiting for instruction. Do not let it expire unoccupied.
Failure Points
Unoccupied Magitek Missiles towers are the most avoidable source of damage in this encounter and the most common one among groups that are not communicating. The tower does not require a dedicated role or special preparation — it simply needs a body inside it. Parties that are fixated on the boss during the cast will sometimes miss the tower entirely, particularly when a Chain Mine field has just appeared and everyone is adjusting their positioning simultaneously. Build the habit of acknowledging the tower the moment it spawns.
Chain Mine field accumulation is the slow attrition mechanic that shapes the second half of the fight. Each new field reduces the arena further, and groups that have been casually clipping the edges throughout will find the final phase uncomfortably tight. The fields deal damage and apply knockback — the knockback in particular can push players into a second field or into a bad position for an incoming Circle of Death or stack mechanic. Treat the field boundaries as hard walls from the moment each one appears.
Hypertuned Grynewaht
Key Mechanics
- Chainsaw — Grynewaht charges his chainsaw and unleashes continuous damage in a frontal arc. He does not move once the attack begins. Players in front of him can sidestep out of the cone.
- Delay-action Charge — Marks two players (later three) with large AoE indicators that track briefly before detonating. Marked players must move away from each other and the rest of the party before the charge resolves.
- Gunsaw — Targets one random player with a continuous piercing beam that tracks their movement. The beam hits anyone caught in the line in front of or behind the targeted player. The targeted player must move the beam away from all allies at all times.
- Thermobaric Charge — Marks a player with a proximity AoE that tracks their position. After a few seconds the tracking ring disappears, leaving the charge at that location as a persistent floor hazard. The marked player must move to a clear area away from the party before the tracking ends, then rejoin the group.
- Clean Cut — Magitek Chakrams appear around the arena edge and slice line AoEs across the floor. Watch where each chakram appears for advance warning of which corridors will be cut.
- Chain Mine — Hypertuned Bits divide the arena into four quadrants with red Chain Mine fields. Frequently used in combination with Thermobaric Charge to restrict where the marked player can safely drop the hazard.
Strategy Notes
Hypertuned Grynewaht is the most mechanically layered encounter in the dungeon, and it is built on a principle of individual responsibility: several of its mechanics require a specific player to act independently and decisively, while the rest of the party must simultaneously manage their own positioning without creating a worse situation for the player handling the personal mechanic. Groups that default to clustering will find Grynewaht consistently punishing.
Chainsaw is the fight’s simplest mechanic to resolve but the easiest to forget during a busy phase. Grynewaht commits to his facing direction when the attack begins and does not track — anyone who was standing in front of him simply needs to sidestep the cone. The cast is clearly telegraphed and the attack window is long, which means there is no execution difficulty here as long as players are watching the boss rather than fixated on the floor.
Delay-action Charge marks two players early in the fight and three as the encounter progresses. Marked players must separate from each other and from the unmarked party members before the charges detonate. The spread requirement is modest compared to some fights at this level, but when three players are marked simultaneously the available spread positions shrink, particularly once Chain Mine fields are active. Marked players should identify open quadrants and move toward them immediately rather than waiting to see where others go.
The two most demanding personal mechanics in this encounter are Gunsaw and Thermobaric Charge, and both require the targeted player to think about where they are moving the hazard rather than simply moving. Gunsaw fires a continuous piercing beam that follows the targeted player and hits anyone in the line in either direction — the targeted player must keep the beam pointed at empty arena space at all times, moving laterally and ensuring no ally is ever caught in the line ahead of or behind them. The temptation to run toward the party during other mechanics must be resisted entirely while Gunsaw is active. Thermobaric Charge gives the marked player a brief window to carry the proximity hazard to a clear area before it locks into place as a floor hazard. The marked player should identify a quadrant that the party does not need and move briskly to it — the tracking ring’s disappearance is the timer, and hesitating wastes the window.
The interaction between Chain Mine and Thermobaric Charge is the fight’s sharpest pressure point. When both are active simultaneously, the arena is divided into four quadrants by the mine fields, and the marked player must carry the Thermobaric Charge into one of the remaining accessible quadrants without stepping through a field in the process. This is not a complex navigation puzzle, but it requires the marked player to have been tracking the field positions rather than reacting to them in the moment. Clean Cut adds another layer during the later phase — the chakrams along the arena edge fire in a readable pattern, and identifying which corridors are safe before they cut provides enough time to position around them cleanly without breaking any of the other concurrent mechanics.
Failure Points
Gunsaw is the mechanic most likely to cause collateral deaths in this encounter. The beam pierces in both directions, which means a targeted player who moves toward a clustered party — whether to stack for Delay-action Charge or simply out of habit — will sweep the beam through multiple allies. The targeted player’s positioning is entirely their own responsibility, and the correct behaviour during an active Gunsaw is to stay wide and away from the group until the beam drops, regardless of what other mechanics are resolving simultaneously. There is no scenario in which moving closer to the party is correct while Gunsaw is tracking.
Thermobaric Charge dropped in shared space is the other consistent source of unnecessary difficulty. A proximity hazard left in the centre of the arena or near a common repositioning corridor forces the entire party to route around it for the rest of the fight, which compounds badly when Chain Mine fields are also active. The marked player should treat the drop location as a permanent decision — choose a corner or a clear edge, drop it there, and return to the group. A hazard placed deliberately in empty space costs nothing; one placed carelessly in a high-traffic area shapes every subsequent mechanic in the fight.
Difficulty Assessment
Doma Castle sits at the upper end of Stormblood’s mid-tier dungeons. The first two encounters are accessible and well-paced introductions to the dungeon’s hazard-management themes, but Hypertuned Grynewaht represents a meaningful step up in simultaneous mechanical demand — asking several players at once to manage personal hazards responsibly while a restrictive arena and multiple concurrent AoEs continue to press the group. It is not a punishing final boss by later-expansion standards, but it is one that consistently identifies which players have developed the habit of thinking about where they are moving hazards rather than just moving.
- Multi-hazard arena tracking across mines, bits, and line AoEs during Magitek Rearguard
- Arena segmentation management and tower soak discipline during Magitek Hexadrone
- Personal hazard ownership — Gunsaw routing and Thermobaric Charge placement — during Grynewaht
- Concurrent mechanic layering: Chain Mine, Clean Cut, Delay-action Charge, and Thermobaric Charge active simultaneously in the final phase
Groups that communicate briefly about tower coverage on the Hexadrone and understand the Gunsaw movement rule before pulling Grynewaht will find the dungeon flows cleanly from start to finish. The mechanics are well-telegraphed throughout, and the hazard-management skills reinforced across the first two encounters transfer directly to the demands of the final boss. Players who have been disciplined about mine and field positioning will find Grynewaht’s arena restrictions familiar rather than overwhelming.
Groups that treat Gunsaw as a movement inconvenience rather than a party-safety responsibility will cause consistent collateral damage in the final encounter, and there is no mechanical correction for it — the beam simply hits whoever is in the line. Similarly, parties that have been careless about Chain Mine fields in the Hexadrone fight will carry those habits into Grynewaht’s combined Chain Mine and Thermobaric Charge phases, where the consequences are sharper and the available space is less forgiving. Doma Castle is a dungeon that rewards attentiveness rather than raw output, and both failure patterns trace back to individual awareness rather than party coordination.
Previous Dungeon: Bardam’s Mettle | Next Dungeon: Castrum Abania
Guildmaster Notes
Doma Castle does not look like a place that has forgotten what it was. The architecture is still there — the lines of it, the intention — but Garlean machinery has been bolted over the old stonework like a scar that never learned to sit flush. Walking through it feels like reading a sentence that has been corrected so many times the original meaning is only visible in the gaps. The castle remembers. The occupation has simply chosen not to.
Grynewaht is what happens when a person becomes a project. Whatever he was before the hypertuning is difficult to locate in what remains — the ambition is still there, sharp and audible, but the shape it has been forced into belongs to someone else’s design. Fighting him in the Hall of the Scarlet Swallow, with Doma’s history pressed into the walls around him, feels less like a battle and more like a correction. Some things should not be rebuilt into something else. The castle, at least, will outlast what was done to both of them.