The Lost City of Amdapor (Hard) Dungeon Guide (FFXIV Heavensward) – Boss Mechanics & Strategy
Duty Information
Expansion: Heavensward
Encounter: The Lost City of Amdapor (Hard)
Players: 4 Players (1 Tank, 1 Healer, 2 DPS)
Duty Finder Type: Dungeon
Level: 60
Unlock Requirement: One More Night in Amdapor
Common Failure Points
- Failing to run away from the Toxic Squamae cloud on Achamoth and taking the full Vulnerability Up explosion.
- Facing the center of the arena during Neura Squamae and being hit by ghost Enthrallment cones.
- Allowing Ancient Aero or Ancient Stone orbs to fully charge on the Winged Lion before a player pops them, taking massive damage.
- Killing the Arcane Sphere too slowly during Ancient Holy while adds are ignored, leading to a full-party explosion.
- Misreading Kuribu’s Reverse stance and stepping into a Cure IV circle or Regen AoE when their effects have been inverted to harm players.


Dungeon Overview
The Lost City of Amdapor (Hard) is a level 60 dungeon introduced in patch 3.2 with Heavensward, revisiting the ancient ruins with a significantly more demanding set of encounters than the original version. It is one of the patch 3.2 optional dungeons and represents a step up in mechanical complexity, particularly in its final boss which introduces a stance-reading system that evolves across three distinct phases.
Achamoth tests positional awareness and debuff handling across overlapping hazard types. The Winged Lion introduces a resistance-debuff assignment system that determines who should safely pop charged orbs to minimize party damage. Kuribu is the dungeon’s most complex encounter — a three-phase fight where the same abilities swap between helping and harming players depending on an active Reverse stance that can be toggled freely in the final phase.
Each fight rewards players who read ability effects carefully rather than assuming consistent behavior. The Lost City of Amdapor (Hard) is a dungeon where knowing what an ability does is not sufficient — knowing what it does right now, in the current stance, is what matters.
Need the unlock path? See All FFXIV Dungeon Unlock Requirements.
Dungeon Objectives
- Unfortunate Eggs destroyed: 3
- Defeat Achamoth
- Eliminate the threat in the Sanctum of Dreams
- Defeat the Winged Lion
- Eliminate the threat in the Crystallum
- Defeat Kuribu
Boss Encounters
Achamoth
Key Mechanics
- Psycho Squamae — Targets a random player and fires a conal AoE from the boss aimed in their direction. Move out of the cone or reposition away from the boss’s facing.
- Neura Squamae — Spawns ghost copies of all players at their current positions. The ghosts occasionally cast Enthrallment, a frontal cone AoE that fires in whichever direction the player was facing when the ability was cast. To avoid being hit by ghost cones, players should face the walls of the arena rather than toward the center, directing Enthrallment outward.
- Toxic Squamae — Marks a random player and creates a toxic cloud tethered to them. If the cloud catches up to the marked player, it explodes — inflicting a stack of Vulnerability Up, dealing damage, and leaving a persistent ground puddle that inflicts Pollen on players who stand in it. The marked player must run continuously around the arena until the cloud dissipates.
- Enthrallment — The ghost Squamae cast frontal cones in the direction players were facing when Neura Squamae resolved. Face the walls to direct these safely away from the party.
Strategy Notes
Achamoth layers three simultaneous hazard types that must be managed in parallel. None of them are individually complex, but their overlap creates the fight’s real difficulty.
When Neura Squamae fires, every player should immediately turn to face the arena walls. The ghost copies are created at your current position facing your current direction — wherever you are looking when the ability resolves determines where the Enthrallment cone fires. Facing the wall sends the cone into the boundary harmlessly. Players who face the center or toward other players during this cast will generate inward-facing cones that can hit the rest of the party during subsequent movement.
When the Toxic Squamae cloud is applied, the marked player must keep moving continuously around the arena perimeter. The cloud moves toward them and will catch up if they stop or slow down. Run until the tether breaks and the cloud dissipates. Be mindful of Pollen puddles from previous Toxic Squamae hits — the perimeter may have restricted areas depending on how many puddles have accumulated.
Psycho Squamae is a standard conal dodge — step to the side or behind the boss when you see yourself targeted. The overlap of all three mechanics running together is where positioning can become complicated, so establish movement habits early.
Failure Points
The most common failures are facing the arena center during Neura Squamae and generating inward Enthrallment cones, and being caught by the Toxic cloud due to stopping movement too early. Both come down to commitment — turn to the wall immediately on Neura Squamae, and keep running on Toxic Squamae until the cloud is fully gone.
Winged Lion
Key Mechanics
- Ancient Libra — Minor arena-wide AoE damage that randomly applies either Wind Resistance Down II or Earth Resistance Down II to each player. Track which debuff you have — it determines your orb-popping assignment for subsequent mechanics.
- Ancient Aero — Targets a random area with a large circle AoE. After it explodes, a wind orb remains on the battlefield and slowly rises, increasing the damage it will deal before eventually exploding for massive party-wide damage. A player must step into it to pop it early, taking moderate damage. After Ancient Libra has been cast at least once, assign this to a player with Earth Resistance Down II to minimize the damage they take.
- Ancient Stone — Targets two players with circle AoEs. Functions identically to Ancient Aero — the orbs left behind must be popped by a player stepping into them. After Ancient Libra, assign this to a player with Wind Resistance Down II.
- Ancient Holy — Winged Lion lifts into the air, becomes untargetable, and casts a large circle AoE. An Arcane Sphere spawns on the ground and grows upward over time before exploding at the cast’s end, dealing massive damage to all players. Kill the Arcane Sphere immediately — it is the only priority during this ability. From the second cast onward, Amdapori Gargoyle adds also spawn. Ignore the adds entirely until the Sphere is dead.
Strategy Notes
The Winged Lion is fundamentally a fight about managing two types of orb hazards — wind and stone — while keeping the Arcane Sphere kill on a tight timeline.
Before Ancient Libra is cast, any player can step into an Aero or Stone orb to pop it. Once Libra applies resistance debuffs to the party, orb assignments become important. The debuffs reduce resistance to specific damage types — stepping into the wrong orb means taking significantly amplified damage. Assign one player as the designated Aero orb popper (Earth Resistance Down II) and one as the Stone orb popper (Wind Resistance Down II), and maintain those assignments for the rest of the fight. Communicate clearly who has which debuff after each Libra cast, as the assignments may shift.
Ancient Holy is a hard priority check every time it appears. When the Winged Lion becomes untargetable and the Arcane Sphere spawns, every DPS must immediately switch to the Sphere. It grows and eventually explodes for massive party-wide damage if not destroyed — there is no safe way to tank this hit. From the second cast onward, adds spawn alongside the Sphere. Do not engage the adds until the Sphere is confirmed dead. They are a lower threat than the explosion and splitting focus risks missing the kill window.
Failure Points
Letting Aero or Stone orbs fully charge because no one pops them is the most avoidable source of large damage spikes. Failing to kill the Arcane Sphere before Ancient Holy completes is the primary wipe condition. After Libra, popping the wrong orb type with the wrong resistance debuff compounds incoming damage unnecessarily — know your assignment and hold it.
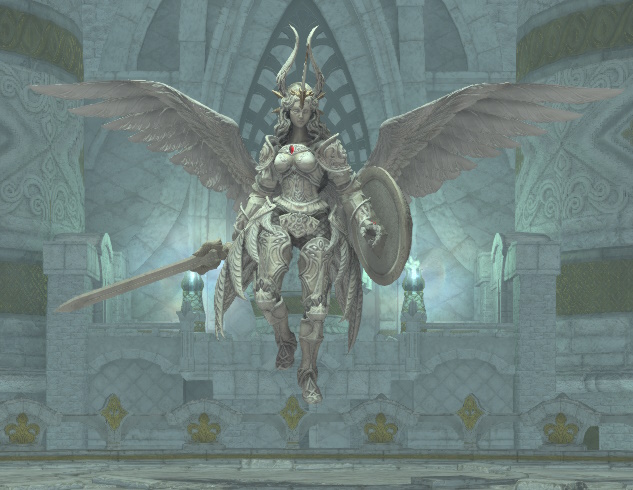
Kuribu
Overview
Kuribu begins the fight with 2 stacks of Seed of Life, which revives her upon death and grants a stack of Vulnerability Down — marking each phase change. She also has permanent Stun Resistance throughout all phases.
The core complexity of this fight is Kuribu’s Reverse stance. Several of her abilities change their effect entirely when Reverse is active — abilities that normally reduce her healing or help the party instead become hazardous. Tracking whether Reverse is currently active is mandatory at all times.
- Phase 1 (2 stacks of Seed of Life) — All effects are normal. No Reverse.
- Phase 2 (1 stack of Seed of Life, Reverse active) — Cure IV and Regen effects are inverted. Reverse is persistent throughout this phase.
- Phase 3 (0 stacks of Seed of Life) — Kuribu can freely toggle between normal and Reverse at any point. Read her current effect before every mechanic.
Key Mechanics
- Glory (all phases) — Frontal cone AoE aimed at the tank. Tank should keep Kuribu facing away from the party.
- Cure IV — Light Circle (Phases 1 and 3 without Reverse) — A light-colored circle AoE. Each player who steps into it removes one healing spike and reduces the HP Kuribu will recover. All four players stepping in negates the healing entirely. Step in.
- Cure IV — Dark Circle (Phases 2 and 3 with Reverse) — A proximity AoE centered on Kuribu. The closer you are, the more damage you take. Move to the arena edges.
- Regen — Normal (Phases 1 and 3 without Reverse) — Applies a Rehabilitation healing buff to Kuribu within the AoE zone. Move Kuribu out of the zone to reduce her healing.
- Regen — Reversed (Phases 2 and 3 with Reverse) — Becomes a persistent ground AoE that inflicts Bleeding on players inside it. Stay out entirely.
- Cure III (Phase 2) — Marks two players with large red ring AoEs. Spread out to distribute and reduce damage taken.
- Decoy (Phase 3) — Spawns one of two adds depending on current Reverse status:
- Reverse active → Low Putto: Tethers to a player and inflicts Bleeding, Prey, and Healing Potency Down. Kill immediately.
- No Reverse → High Putto: Tethers to Kuribu and heals her. Kill immediately.
Both Putto types take priority over Kuribu regardless of which spawns.
- Reverse — Grants the Reverse buff to Kuribu, switching the effects of Cure IV and Regen from their normal beneficial-disruption state to their harmful-to-players state.
Strategy Notes
Kuribu demands constant stance awareness. Every time a mechanic fires, the first question is whether Reverse is currently active — because the correct response to Cure IV and Regen is opposite depending on the answer.
In Phase 1, all effects are consistent and intuitive. Step into Cure IV circles to negate healing. Move Kuribu out of Regen zones to reduce her recovery. Establish these habits cleanly because they will be inverted in Phase 2.
In Phase 2, Reverse is permanently active. The light Cure IV circle is now a dark proximity AoE — do not step in, move to the arena edge instead. The Regen zone is now a persistent ground AoE inflicting Bleeding — do not stand in it. Players who carry Phase 1 habits into Phase 2 without adjusting will take avoidable damage from both. Cure III marks two players with large red rings — spread immediately when these appear.
Phase 3 is the fight’s most demanding section because Kuribu toggles Reverse freely. Before every Cure IV or Regen, confirm whether the Reverse buff is currently showing on Kuribu’s status. Do not assume the stance has remained the same from the previous cast. The visual difference between the light and dark Cure IV circles provides a secondary cue — but reading the buff directly is more reliable.
In Phase 3, Decoy introduces add spawns that must be killed before resuming damage on Kuribu. The type of add depends entirely on whether Reverse is active when Decoy is cast. Both Putto types are dangerous in different ways and neither should be ignored — kill whichever spawns immediately before returning to the boss.
The tank should keep Kuribu consistently faced away from the party throughout all phases to manage Glory‘s persistent frontal cone.
Failure Points
The most common wipe pattern on Kuribu is players carrying Phase 1 behavior into Phase 2 or Phase 3 without reading the current stance — stepping into a dark Cure IV proximity AoE or standing in a reversed Regen Bleeding zone. In Phase 3, where stance switches freely, this becomes a consistent threat every time either ability fires. Always read the current Reverse status before acting on any mechanic, and treat Decoy adds as an unconditional priority regardless of type.
Difficulty Assessment
The Lost City of Amdapor (Hard) is one of the more mechanically sophisticated patch 3.2 dungeons, with each boss introducing a system that requires active reading rather than rote pattern execution. Achamoth layers simultaneous hazard types that interact with positioning. The Winged Lion introduces a resistance-based orb assignment system that rewards communication. Kuribu is a stance-reading fight that evolves across three phases, culminating in a final phase where no mechanic can be assumed to behave the same way it did before.
The dungeon emphasizes:
- Directional control and continuous movement under tethered debuff pressure
- Resistance debuff tracking and coordinated orb assignment
- Hard add kill priority under time-sensitive conditions
- Active stance reading with opposite correct responses depending on current effect
Groups who communicate and pay close attention to current ability states will find this dungeon deeply satisfying to execute cleanly. Those who autopilot through mechanics without checking current conditions — particularly on Kuribu in Phase 3 — will find the dungeon correcting them in clear and consistent ways.
Previous Dungeon: The Antitower | Next Dungeon: Sohr Khai
Guildmaster Notes
Amdapor does not let things go easily. The original city held on long after it should have been silent, and the Hard version of its ruins holds on in the same way — not through strength, but through layers. Every fight here has something underneath what it first appears to be. Achamoth reflects the party back at itself. The Winged Lion turns resistance into assignment. Kuribu reverses the meaning of healing itself.
There is a logic to all of it that only becomes visible once you have been through each encounter a few times. The dungeon is arguing something — that things are not always what they appear, that the same action can help or harm depending on the moment, that reading a situation correctly matters more than reacting quickly. For a ruin, it makes a surprisingly coherent point.