Thok ast Thok (Extreme) Guide – Ravana Mechanics
Duty Information
Expansion: Heavensward
Encounter: Thok ast Thok (Extreme)
Players: 8 (Tank / Tank / Healer / Healer / DPS / DPS / DPS / DPS)
Duty Finder Type: Trial
Level: 60
Item Level: 175
Unlock Requirement: Thok Around the Clok
Encounter Overview
Thok ast Thok (Extreme) is a level 60 trial introduced in patch 3.0 during Heavensward. Players face
Ravana, Lord of the Hive, in a highly structured encounter built around rotating stance phases,
strict positioning requirements, and complex multi-step mechanics.
Ravana cycles through three distinct stances—Dragonfly, Scorpion, and
Beetle—each introducing different mechanics and execution checks. The encounter follows a largely
fixed rotation, meaning success comes from memorization, positioning discipline, and clean execution.
Arena Overview
The fight takes place on a circular platform with destructible outer fencing. As the encounter progresses,
sections of the arena become unsafe due to knockbacks, making positioning increasingly important.
Waymarks are commonly assigned in a cardinal pattern (A = North, B = East, C = South, D = West) to handle
movement-heavy mechanics during Scorpion phases.
Mechanic Archive
Blinding Blade
A high-damage frontal cleave. Tanks should share this damage or rotate Ravana to distribute it safely
if solo tanking.
The Seeing X
Ravana creates barriers on three sides of his body, leaving only one safe direction to attack.
- Seeing Right: Safe on his left side.
- Seeing Left: Safe on his right side.
- Seeing Wings: Safe in front.
Atma-Linga
Raidwide damage used frequently throughout the encounter. Healers should be prepared for repeated casts
in later phases.
Tapasya
A three-hit frontal cone attack. Tanks should move after the first hit to avoid the remaining strikes.
Warlord Shell
A protective shield that must be destroyed before it expires. Failure to break it results in a wipe.
Prelude to Liberation
A sequence of AoEs including point-blank damage, line attacks, random circles, and player-targeted explosions.
Players must spread carefully to avoid overlapping damage zones.
Liberation
A multi-step mechanic involving safe zones behind Ravana, clone spawns, and sequential charges across the arena.
Players must identify safe positions quickly and rotate around the arena as the charges resolve.
Swift Liberation
Four players are marked and assigned positions at cardinal waymarks. Ravana charges between them in sequence,
leaving dangerous AoEs behind. Proper positioning and movement between markers is required to avoid overlapping damage.
Final Liberation
A complex mechanic involving Prey targets, charge attacks, player spreads, and alternating safe zones between
center and outer edges. Groups typically use a predefined strategy to handle the Prey assignments and positioning.
Bloody Fuller / Chandrahas
Ravana’s ultimate ability. The damage taken depends on how many swords are generated during the add phase.
Proper execution of the add phase minimizes incoming damage.
Gana Adds
Adds that spawn during the Dragonfly phase leading into the ultimate. They must be defeated before they finish
casting Falling Laughter to prevent additional damage during Chandrahas.
Pillars of Heaven
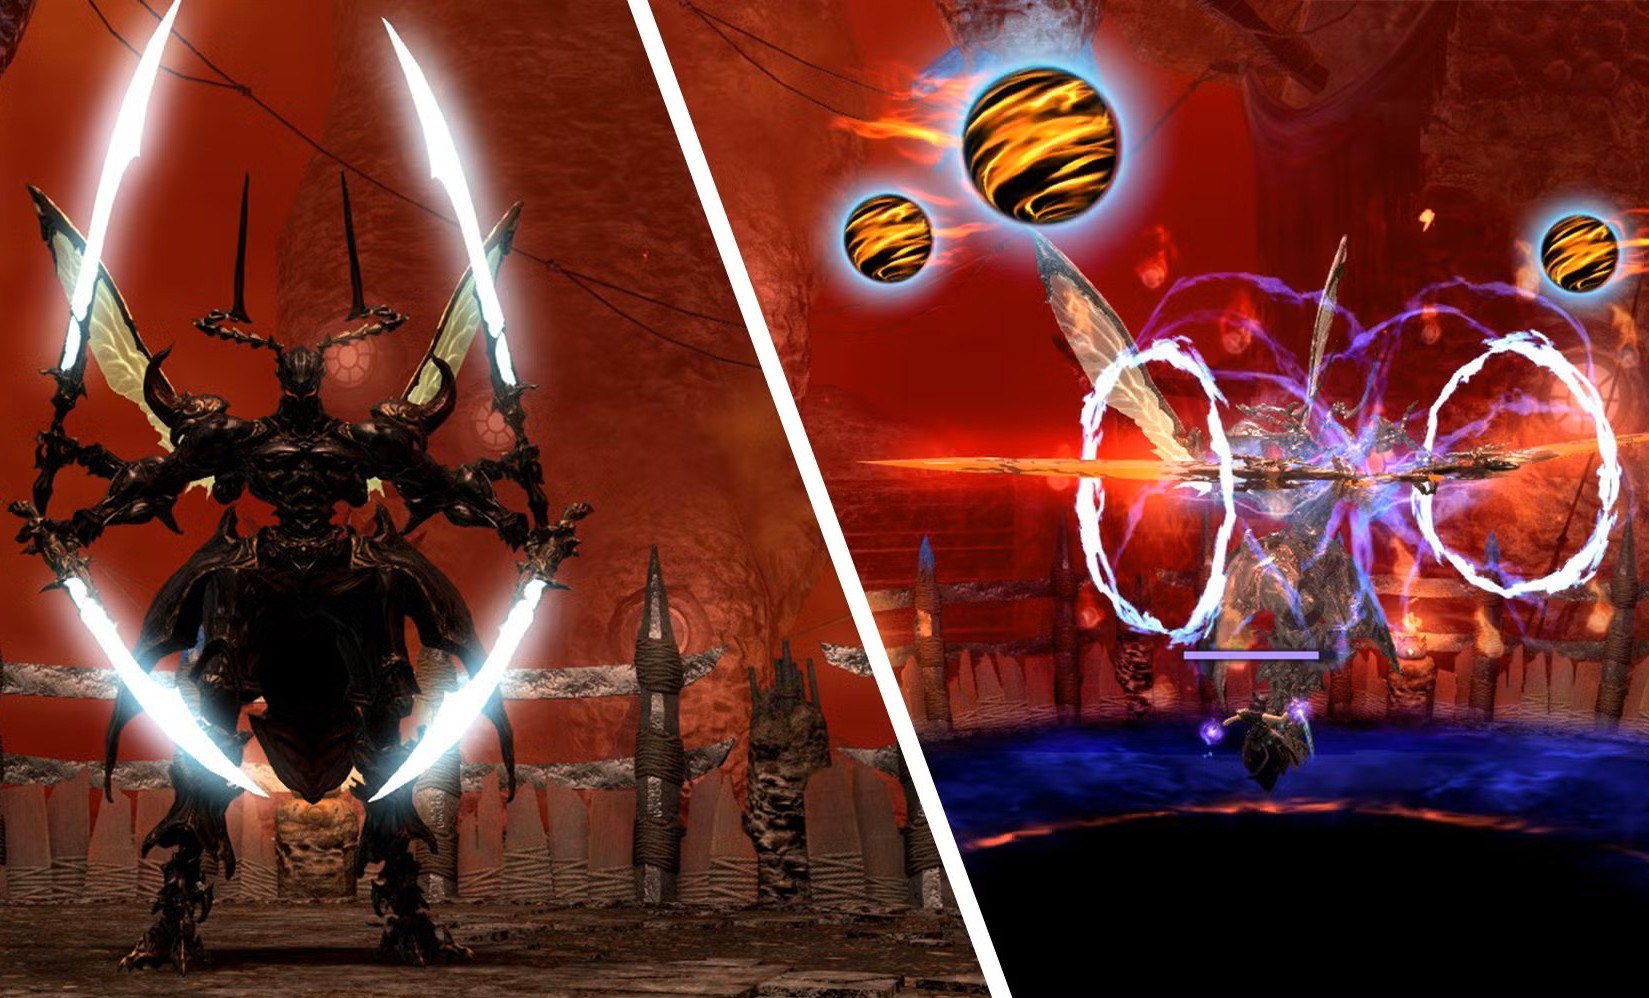
A knockback raidwide attack with damage based on proximity. Players should position near the edge to control
knockback distance safely.
Laughing Rose
A stack marker placed on a player. The party must group together to share the damage.
Surpanakha
A series of frontal cone attacks targeting a player with Prey. The debuff should be passed to a tank to safely
handle the repeated hits.
Rose of Conviction
Orb tethers follow players and explode after a short duration. The group should move together along the edge
to control orb placement and avoid overlap.
Rose of Hate
A linear attack targeting the tank. Should be avoided by the rest of the party.
Encounter Flow
Phase 1 – Dragonfly
The fight opens with Ravana’s basic attacks, including Blinding Blade,
The Seeing X, and Atma-Linga. This phase establishes the rhythm of
movement and positioning for the rest of the encounter.
Phase 2 – Scorpion
Ravana transitions into Scorpion stance, introducing the first Liberation sequences.
This phase is a major execution check, requiring precise positioning and awareness of overlapping AoEs.
Phase 3 – Dragonfly + Ultimate
Ravana returns to Dragonfly stance while spawning Gana adds. The party must defeat the adds
before they complete their casts to minimize the damage from Bloody Fuller and
Chandrahas.
Phase 4 – Beetle
In Beetle stance, Ravana becomes more defensive while introducing knockbacks and orb mechanics.
Players must manage Pillars of Heaven, stack for Laughing Rose, and handle
Prey mechanics cleanly.
Phase 5 – Scorpion
This is the most mechanically demanding portion of the fight. Ravana uses
Swift Liberation and Final Liberation, requiring strict adherence to
assigned positions and movement patterns.
Phase 6 – Dragonfly
A high-damage phase with frequent raidwide attacks. Healers must stabilize the party while players continue
executing standard Dragonfly mechanics.
Phase 7 – Beetle
A repeat of the Beetle phase with increased pressure. This is a common point to defeat Ravana if execution
has been clean.
Phase 8 – Scorpion
Ravana performs one final Liberation sequence. The party must defeat him before the mechanic completes,
or he will transition into enrage.
Enrage
Ravana casts Bloody Fuller followed by multiple hits of Laughing Moon
before finishing with Chandrahas, wiping the party.