The Porta Decumana Trial Guide
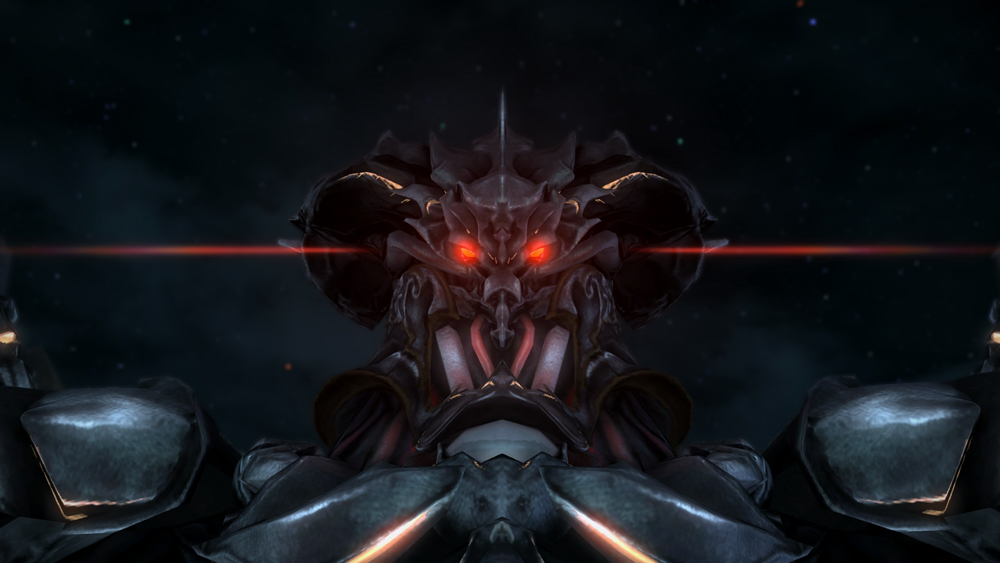
The Porta Decumana is a level 50 trial introduced in A Realm Reborn and redesigned in Patch 6.1 to function as a standalone encounter separate from The Praetorium. In this battle, players face the Ultima Weapon, an Allagan warmachina capable of wielding the power of multiple primals.
The encounter is divided into two major phases. In the first phase, the Ultima Weapon channels the abilities of Titan, Garuda, and Ifrit in sequence. In the second phase, the weapon fights independently using a variety of magitek-based attacks while preparing its ultimate weapon: Ultima.
This guide explains the mechanics and telegraphs used throughout the encounter so players can understand how the fight progresses and react accordingly.
Encounter Info
-
Expansion: A Realm Reborn
-
Encounter Type: Trial
-
Duty: The Porta Decumana
-
Boss: The Ultima Weapon
-
Level: 50 (Sync: 50)
-
Party Size: 4 Players (Light Party)
-
Arena: Large magitek battlefield platform
-
Unlock Quest: The Ultimate Weapon
Encounter Overview
The Porta Decumana serves as the climactic confrontation of the A Realm Reborn main scenario. The Ultima Weapon begins the battle by channeling the power of captured primals, gaining access to their abilities and ultimate attacks.
After these powers are removed, the Ultima Weapon enters a second phase where it relies on advanced magitek weaponry, combining tankbusters, area attacks, knockbacks, and projectile mechanics while preparing a final hard enrage attack.
Arena Analysis
The battle takes place on a large circular battlefield with no environmental hazards or falling edges. However, the encounter frequently fills large portions of the arena with area attacks and proximity markers.
Because several mechanics involve directional attacks or knockbacks, players must remain aware of their positioning relative to both the Ultima Weapon and incoming environmental effects.
Phase Structure
Phase One – Primal Assimilation
The Ultima Weapon channels the power of three primals in sequence:
-
Titan
-
Garuda
-
Ifrit
Each primal grants the weapon access to several of that primal’s signature abilities.
Phase Two – Magitek Weapon Systems
After a cutscene, the Ultima Weapon returns at full health with an entirely new set of mechanics, relying on magitek weapons and energy attacks.
This phase ends when the party defeats the Ultima Weapon before it completes its Ultima cast.
Boss Mechanics
Earthen Fury
Type: Raidwide damage
How to Recognize It
-
Titan appears during the fight and begins casting his ultimate attack.
What It Does
Deals heavy damage to the entire party.
Why It’s Dangerous
Players may already be damaged by earlier mechanics.
How Players Handle It
Healers must quickly restore the party’s health after the attack resolves.
Geocrush
Type: Proximity AoE
How to Recognize It
-
A proximity marker appears on the arena floor.
What It Does
Titan crashes into the arena at the marked location.
Why It’s Dangerous
Players close to the impact take significantly more damage.
How Players Handle It
Players should move away from the impact marker.
Landslide
Type: Line AoE / Knockback
How to Recognize It
-
A linear attack forms across the arena.
What It Does
A shockwave travels across the battlefield.
Why It’s Dangerous
Players caught in the line attack take heavy damage.
How Players Handle It
Players should move out of the attack path.
Weight of the Land
Type: Ground AoE pattern
How to Recognize It
-
Multiple circular indicators appear across the arena.
What It Does
The marked areas erupt shortly afterward.
Why It’s Dangerous
Standing inside the indicators results in damage.
How Players Handle It
Players should move away from the marked areas.
Granite Interment
Type: Player restraint mechanic
How to Recognize It
-
Players become trapped inside stone prisons.
What It Does
Players are immobilized while the Ultima Weapon prepares its next attack.
Why It’s Dangerous
The party becomes vulnerable to follow-up attacks.
How Players Handle It
Hydaelyn intervenes to free the party during the encounter.
Aerial Blast
Type: Raidwide damage
How to Recognize It
-
Garuda appears and prepares her ultimate attack.
What It Does
Deals heavy damage to the entire party.
Why It’s Dangerous
The attack occurs shortly after other mechanics.
How Players Handle It
Healers should restore the party’s health afterward.
Eye of the Storm
Type: Donut AoE
How to Recognize It
-
Wind surrounds the outer edge of the arena.
What It Does
The outer ring of the arena becomes dangerous.
Why It’s Dangerous
Players standing near the edge take heavy damage.
How Players Handle It
Players should move toward the center of the arena.
Mistral Shriek
Type: Point-blank AoE
How to Recognize It
-
Garuda teleports to the edge of the arena.
What It Does
Deals heavy damage to players nearby.
Why It’s Dangerous
Players standing close to Garuda can take severe damage.
How Players Handle It
Players should move away from Garuda when she teleports.
Hellfire
Type: Raidwide damage
How to Recognize It
-
Ifrit appears and begins casting his ultimate attack.
What It Does
Deals heavy fire damage to all players.
Why It’s Dangerous
This attack occurs after several other mechanics.
How Players Handle It
Healers should quickly restore party health.
Radiant Plume
Type: Ground AoE
How to Recognize It
-
Multiple circular markers appear on the arena floor.
What It Does
The marked areas erupt in flames.
Why It’s Dangerous
Players remaining inside the indicators will take damage.
How Players Handle It
Players should move into safe areas of the arena.
Vulcan Burst
Type: Knockback
How to Recognize It
-
Ifrit releases a burst of fire energy.
What It Does
Knocks players away from the center of the arena.
Why It’s Dangerous
Players may be pushed into follow-up attacks.
How Players Handle It
Players should reposition quickly after the knockback.
Phase Two Mechanics
Homing Lasers
Type: Tankbuster
How to Recognize It
-
The Ultima Weapon targets the player with highest enmity.
What It Does
Deals heavy damage to the tank.
Why It’s Dangerous
The attack can significantly reduce the tank’s health.
How Players Handle It
The tank should mitigate the incoming damage.
Magitek Ray
Type: Sequential line AoEs
How to Recognize It
-
The Ultima Weapon fires multiple beams across the arena.
What It Does
Three line attacks sweep across the battlefield.
Why It’s Dangerous
Players caught in the beams take heavy damage.
How Players Handle It
Players must move out of each beam’s path.
Homing Ray
Type: Targeted AoE markers
How to Recognize It
-
Circular indicators appear on multiple players.
What It Does
Each marked player triggers an explosion at their location.
Why It’s Dangerous
Overlapping markers increase damage taken.
How Players Handle It
Players should spread apart.
Tank Purge
Type: Raidwide damage
How to Recognize It
-
The Ultima Weapon begins casting the attack.
What It Does
Deals unavoidable damage to the entire party.
Why It’s Dangerous
Players may already be damaged from previous mechanics.
How Players Handle It
Healers should prepare to restore the party’s health.
Aetheric Boom
Type: Knockback attack
How to Recognize It
-
The Ultima Weapon releases a burst of energy.
What It Does
Pushes players away from the boss.
Why It’s Dangerous
Players may be knocked into other attacks.
How Players Handle It
Players should adjust their positioning accordingly.
Aetheroplasm
Type: Orb mechanic
How to Recognize It
-
Pairs of tethered orbs appear in the arena.
What It Does
If the orbs collide, they deal significant damage.
Why It’s Dangerous
Uncontrolled orb movement can harm the party.
How Players Handle It
Players can absorb the orbs to prevent them from colliding.
Citadel Buster
Type: Line AoE tankbuster
How to Recognize It
-
A green beam forms in front of the Ultima Weapon.
What It Does
A powerful beam attack fires straight ahead.
Why It’s Dangerous
Players standing in front of the weapon take heavy damage.
How Players Handle It
Players should avoid standing in front of the boss.
Magitek Bits
Type: Environmental attack
How to Recognize It
-
Magitek devices appear around the arena.
What They Do
They fire directional line attacks.
Why They’re Dangerous
Players standing in their firing path take damage.
How Players Handle Them
Players should watch their orientation and move out of the attack path.
Explosion
Type: Proximity AoE
How to Recognize It
-
Proximity markers appear where gunships crash.
What It Does
Deals damage based on player distance from the impact.
Why It’s Dangerous
Standing near the crash site causes heavy damage.
How Players Handle It
Players should move toward the center of the arena.
Ultima
Type: Hard enrage
How to Recognize It
-
The Ultima Weapon moves to the center of the arena and begins casting Ultima.
What It Does
If the cast completes, the entire party is defeated.
Why It’s Dangerous
This attack ends the encounter if not interrupted.
How Players Handle It
Players must defeat the Ultima Weapon before the cast completes. Hydaelyn will restore the party’s Limit Break gauge during the cast.
Mechanic Interaction Notes
In the second phase of the encounter, the Ultima Weapon begins combining line attacks, orb mechanics, knockbacks, and spread markers. These mechanics often occur in quick succession, requiring players to reposition frequently while maintaining awareness of directional attacks.
The final moments of the fight culminate in the Ultima enrage cast, forcing players to finish the battle quickly.
Role Pressure Analysis
Tank Pressure
The tank must manage heavy attacks such as Homing Lasers and avoid standing in front of Citadel Buster.
Healer Pressure
Repeated raidwide damage from Tank Purge and primal ultimate attacks requires constant healing.
DPS Pressure
DPS players must defeat the Ultima Weapon before the Ultima cast finishes.
Common Failure Points
Wipes during this encounter commonly occur when:
-
players fail to avoid Magitek Ray or Citadel Buster
-
Aetheroplasm orbs collide
-
players remain too close to proximity explosions
-
the Ultima Weapon finishes casting Ultima
Difficulty Profile
| Category | Rating |
|---|---|
| Mechanical Complexity | Moderate |
| Reaction Speed | Moderate |
| Positioning Precision | Moderate |
| Recovery Difficulty | Moderate |
| Punishment Severity | High |
Guild Summary
The Porta Decumana represents the climactic battle against the Ultima Weapon and showcases the weapon’s ability to channel the powers of captured primals. After surviving these borrowed abilities, players must contend with the weapon’s own arsenal of magitek attacks before defeating it prior to its devastating Ultima enrage.