The Howling Eye (Hard) Trial Guide
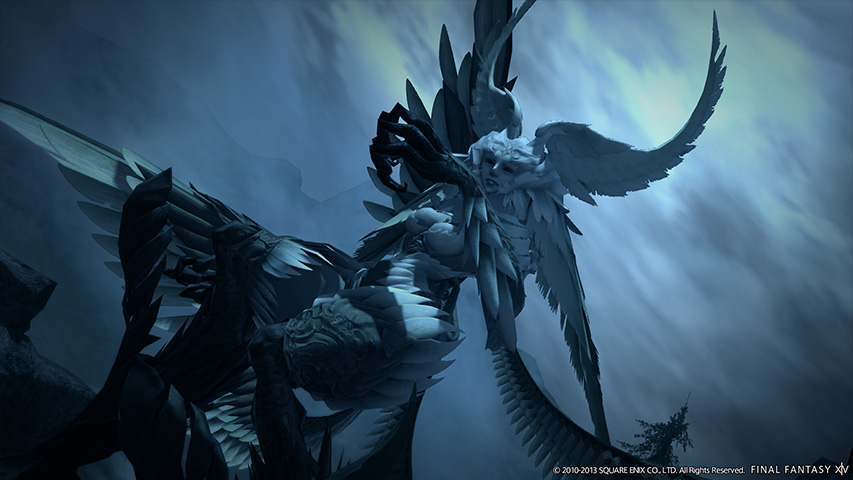
The Howling Eye (Hard) is a level 50 trial introduced in A Realm Reborn. In this encounter, players face Garuda, the Lady of the Vortex, in a significantly expanded version of the original fight. The encounter introduces additional line-of-sight mechanics, destructive tornado hazards, and coordinated add phases involving Garuda’s lieutenants Suparna and Chirada.
Throughout the encounter, players must manage pillar protection, eliminate dangerous adds, and navigate rotating tornado hazards while avoiding Garuda’s powerful wind-based attacks.
Encounter Info
-
Expansion: A Realm Reborn
-
Encounter Type: Trial
-
Duty: The Howling Eye (Hard)
-
Boss: Garuda
-
Level: 50 (Sync: 50)
-
Party Size: 8 Players (Full Party)
-
Arena: Circular arena with destructible stone pillars
-
Unlock Quest: In for Garuda Awakening
Encounter Overview
The Howling Eye (Hard) builds upon the mechanics introduced in the original encounter while significantly increasing the complexity of the fight. Garuda’s attacks continue to revolve around line-of-sight mechanics and pillar protection, but the encounter now includes multiple add waves, persistent tornado hazards, and coordinated attacks from Garuda’s companions.
As the battle progresses, the arena becomes increasingly dangerous as tornadoes restrict movement and Garuda repeatedly summons additional enemies to assist her.
Arena Analysis
The encounter takes place in a circular arena surrounded by stone pillars. These pillars serve as protection against Garuda’s powerful wind attacks, but they can be destroyed by both Garuda’s abilities and certain adds.
During the later phases of the encounter, large tornadoes known as Great Whirlwinds appear throughout the arena. These tornadoes deal heavy damage to players who enter them and significantly restrict movement around the battlefield.
Positioning and awareness of safe zones become increasingly important as the fight progresses.
Phase Structure
Phase One (100% – ~50%)
Garuda uses her core abilities while periodically teleporting around the arena and performing powerful wind attacks that require players to hide behind stone pillars. Razor Plume adds spawn during this phase and must be defeated quickly to prevent them from destroying the pillars.
Transition – Aerial Blast
At approximately half health, Garuda moves to the center of the arena and casts Aerial Blast, her signature raidwide attack. The amount of damage dealt depends on how many stone pillars remain intact.
Phase Two – Tornado Phase
After Aerial Blast resolves, Garuda summons powerful tornadoes and begins spawning additional enemies, including Satin Plumes, Suparna, and Chirada. These adds must be managed carefully while navigating the increasingly restricted arena.
Boss Mechanics
Downburst
Type: Frontal cleave
How to Recognize It
-
Garuda strikes the area directly in front of her.
What It Does
Deals moderate damage to all players standing in front of Garuda.
Why It’s Dangerous
Multiple players hit by the attack can take significant damage.
How Players Handle It
Garuda should be faced away from the party.
Wicked Wheel
Type: Point-blank AoE
How to Recognize It
-
Garuda performs a spinning attack around herself.
What It Does
Deals moderate damage to nearby players and also damages nearby pillars.
Why It’s Dangerous
Players standing close to Garuda risk unnecessary damage while also weakening the protective pillars.
How Players Handle It
Players should avoid standing too close to Garuda.
Slipstream
Type: Frontal column attack
How to Recognize It
-
Garuda pauses briefly before unleashing a wind blast in front of her.
What It Does
Deals heavy damage and stuns players hit by the attack.
Why It’s Dangerous
Players stunned by the attack may be unable to react to subsequent mechanics.
How Players Handle It
Players should avoid standing in front of Garuda.
Friction
Type: Targeted ranged attack
How to Recognize It
-
Garuda targets a random player.
What It Does
Deals damage to the targeted player and nearby allies while also damaging stone pillars.
Why It’s Dangerous
Stacked players may take overlapping damage.
How Players Handle It
Players should maintain some spacing from one another.
Mistral Song
Type: Line-of-sight attack
How to Recognize It
-
Garuda disappears and reappears on the edge of the arena.
What It Does
She fires a massive wind blast across the battlefield.
Why It’s Dangerous
Players caught in the attack take extremely heavy damage.
How Players Handle It
Players must hide behind stone pillars to break line of sight.
Mistral Shriek
Type: Line-of-sight attack
How to Recognize It
-
Garuda teleports to the center of the arena.
What It Does
A powerful wind blast strikes players in her line of sight.
Why It’s Dangerous
Players exposed to the attack take very heavy damage.
How Players Handle It
Players must hide behind pillars to block the attack.
Aerial Blast
Type: Signature raidwide attack
How to Recognize It
-
Garuda teleports to the center and begins casting Aerial Blast.
What It Does
Deals massive damage to the entire party.
Why It’s Dangerous
Damage increases if stone pillars have been destroyed.
How Players Handle It
Keeping pillars intact during Phase One reduces the damage taken.
Add Mechanics
Razor Plumes
Type: Add wave
What They Do
These small enemies attack players and damage the stone pillars.
Why They’re Dangerous
If left alive, they can destroy the pillars needed to survive Garuda’s attacks.
How Players Handle Them
Players should eliminate Razor Plumes quickly when they appear.
Satin Plume
Type: Debuff add
What It Does
Applies a Sleep effect to the party.
Why It’s Dangerous
The debuff can leave players vulnerable to other attacks.
How Players Handle It
Satin Plumes should be defeated immediately.
Suparna and Chirada
Type: Elite adds
What They Do
These enemies fight alongside Garuda and can tether to her with beams that either increase her damage or heal her.
Why They’re Dangerous
If left alive, they significantly increase Garuda’s damage or restore her health.
How Players Handle Them
Players should prioritize defeating the add that is healing Garuda before eliminating the other.
Environmental Mechanics
Great Whirlwind
Type: Arena hazard
How to Recognize It
-
Large tornadoes appear around the arena.
What It Does
Players caught inside the tornado take heavy damage.
Why It’s Dangerous
The tornadoes restrict movement and limit safe areas within the arena.
How Players Handle It
Players must carefully navigate around the tornadoes while continuing to resolve mechanics.
Eye of the Storm
Type: Arena restriction
How to Recognize It
-
Garuda creates a massive vortex surrounding the arena.
What It Does
The outer edges of the arena become extremely dangerous.
Why It’s Dangerous
Players outside the safe center area take heavy damage.
How Players Handle It
Players must remain near the center of the arena.
Mechanic Interaction Notes
The second phase of the encounter combines tornado hazards, add waves, and Garuda’s standard attacks, forcing players to constantly reposition while managing multiple threats simultaneously.
Because the arena becomes increasingly restricted by tornadoes, positioning mistakes become far more dangerous as the fight continues.
Role Pressure Analysis
Tank Pressure
Tanks must maintain Garuda’s position while also managing the additional enemies that appear throughout the encounter.
Healer Pressure
The combination of raidwide damage, add mechanics, and player mistakes during tornado movement can create significant healing pressure.
DPS Pressure
DPS players must quickly eliminate priority targets such as Satin Plumes and the healing add among Suparna and Chirada.
Common Failure Points
Wipes during this encounter commonly occur when:
-
players fail to hide behind pillars during Mistral Song or Mistral Shriek
-
Satin Plumes are not defeated quickly
-
tornado hazards restrict player movement during critical mechanics
-
Garuda is healed by tethered adds
Difficulty Profile
| Category | Rating |
|---|---|
| Mechanical Complexity | High |
| Reaction Speed | Moderate |
| Positioning Precision | High |
| Recovery Difficulty | Moderate |
| Punishment Severity | High |
Guild Summary
The Howling Eye (Hard) transforms the original Garuda encounter into a much more complex battle involving destructive tornado hazards and coordinated add management. Success requires careful positioning, quick add prioritization, and maintaining the stone pillars needed to survive Garuda’s most powerful attacks.